Perhaps you've been hanging around the Piece of Cake kitchen long enough to learn about my Happy Place, the imaginary wonderland to which I tend to drift when things go awry, or even when things are going fantastically well. Its that daydream wherein I have a long, loud lunch with several of my culinary heroes, and we all get to chitchatting like old friends. It's glorious, basically. And at the head of the virtual table sits my personal Food Oprah, Lynne Rossetto Kasper. She's the host of The Splendid Table, a radio show that covers everything you could possibly want to know about food, cooking and baking. It is the Happy Place of many, I am sure.

And guys? Um, recently? I actually got to talk to LRK herself as I contributed a question to the call-in portion of the show. I tried not to die a little from the fabulousness of it all. I also somehow managed not to tell her about my restraining-order-level fandom and related crazy daydream. I know, I don't know EITHER.

But what we did talk about was terrific. As LRK is an expert on all things related to Italian cuisine, I wanted to get her suggestions for a few rustic Italian dessert recipes that I might try and share with you all. I've unleashed my panna cotta obsession on you a few times, and I wanted something in that same vein--something wholly delicious in its simplicity, the sort of thing I might pull together if I was a housewife in the Italian countryside (which, by the way, is also a daydream I have, but that is neither here nor there).


Faster than you could say "Culinary Psychic", Lynne pulled an idea out of the ether to meet my inquiry. I really don't know how she does it, people. She is so flippin' amazing that I would pretty much try any recipe she threw at me, even if it meant going against one of my strongest personal pastry beliefs and putting salad ingredients in my dessert. Like rosemary and extra virgin olive oil. Say what? I ruffled a bit at first, but dang if she wasn't right on. Every time, that LRK! Magic.


So the next day, I pulled together a lively fruit crostata with a few of the usual suspects--buttery pastry, tart apples, a dash of sugar. But! Per LRK's instructions, I upped the crazy with the addition of red grapes, a smattering of rosemary and a finishing drizzle of the sort of potent olive oil that someone gifts you for Christmas and you hang onto it for a special occasion. Because believe me, this crostata is indeed something special.

Now, I did riff a bit on her suggestions, but as any disciple of The Church of LRK can attest, this is something we are encouraged to do regularly. Not to mention that my choice to incorporate fresh rosemary into a frangipane (rather than just sprinkling it about) was downright delightful, so I feel good about going off the rails a bit here. It's what Lynne would want.

The nutty, ambrosial frangipane gives a bit of richness and offers a nice cushion for the fresh rosemary, muting it just a touch so you get all its lovely herbacious notes and a hint of woodsiness to elevate the fruit flavors (including the ones in the olive! oil!) without the pungent, almost soapy, quality that rosemary can often have.

And hello, baked grapes?! Why have I not been doing this my entire life? The grape flavor becomes so lush, so alive, it's like grapes on steroids. They taste the way I felt after talking to LRK. See, I told you I was nuts.

Herbed Fruit Crostata with Apples and Grapes
Inspired by and adapted from Lynne Rossetto Kasper

I've used a firm, tart apple here, but pears of any variety would also be wonderful.

For the fruit:

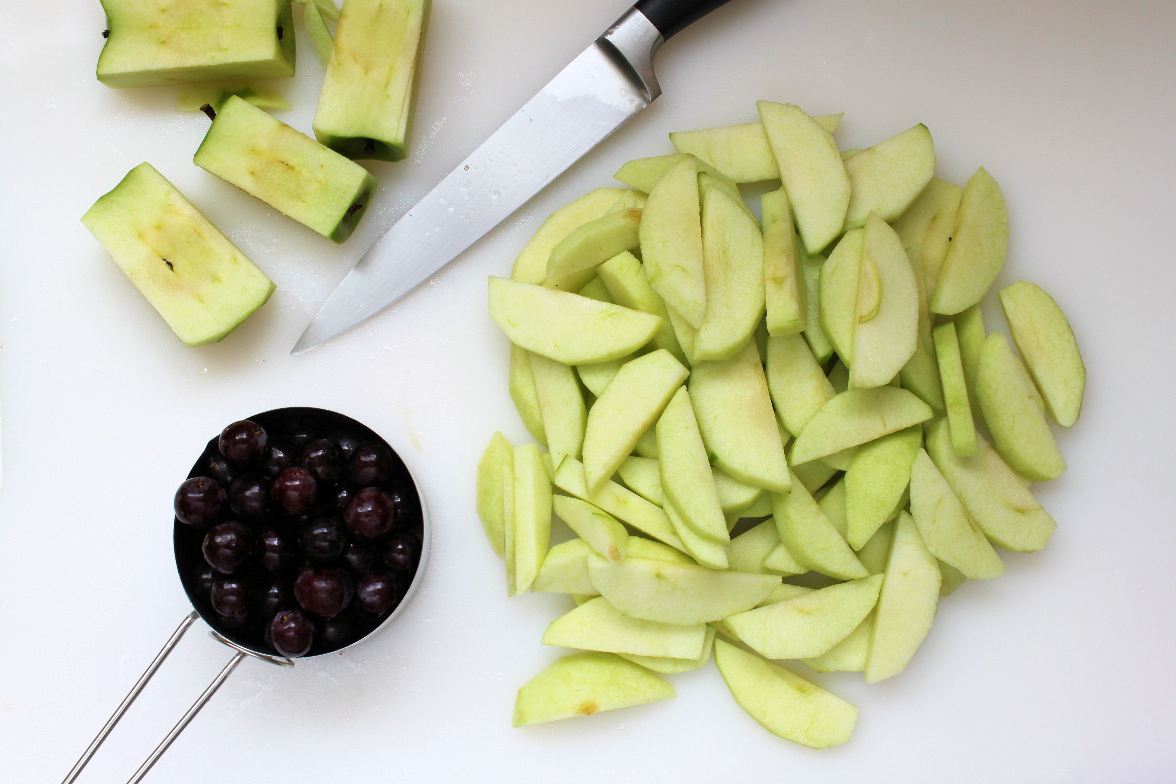
4 medium Granny Smith apples, peeled, cored and sliced into 1/4 inch-thick slices
1 cup red seedless grapes (halved if they're on the large side)
1 tablespoon freshly squeezed lemon juice
2 tablespoons brown sugar

For the rosemary frangipane:

4 ounces almond paste, crumbled
1/2 teaspoon finely minced fresh rosemary
1 1/2 teaspoons sugar
1 1/2 teaspoons all-purpose flour
1/8 teaspoon almond extract
6 tablespoons unsalted butter, cut into cubes, at room temperature
1 large egg, at room temperature

For the crust:

1 10-inch pie crust (like half a batch of My Favorite Pie Crust), well-chilled
1 tablespoon unsalted butter, melted
2 teaspoons extra virgin olive oil

Preheat the oven to 375 degrees. Line a baking sheet with parchment paper.

In a medium bowl, toss together the apples, grapes, lemon juice and brown sugar. Set aside to let the flavors hang out for a while.

In the bowl of a food processor, place the almond paste, rosemary, sugar, flour and almond extract. Pulse until the mixture is well-blended and evenly textured. Add butter and process until well-mixed. Scrape down the bowl and add the egg. Process until the frangipane is perfectly smooth.

Lightly sprinkle a work surface and a rolling pin with flour, and roll the pie crust into a large, shaggy-edged circle, about 14 inches in diameter. Roll the crust onto your rolling pin to help you carefully transfer the crust to the parchment-lined sheet pan. Smear the crust with the frangipane, leaving about a 2-inch border right around the edges of the crust. Place the apple slices onto the crust, first in a single layer, and then tuck any slices that remain into the gaps. Be sure to pull the apples from any liquid that has pooled in the bottom of the bowl rather than dumping the whole lot atop the crust--you don't want to make the crust soggy. Artfully dot the grapes across the surface of the apples. Fold the edges of the crust up and over the fruit, leaving the center exposed.

Whisk together the melted butter and olive oil, and lightly brush the crust with it. Dribble any extra over the fruit. Bake the crostata until the crust is golden and the fruit is bubbling, about 1 hour. Let cool on the pan for five minutes before using the parchment to slide the crostata onto a wire rack to cool further. Just before serving, sprinkle the crostata with a, extra smattering of fresh rosemary and a tiny drizzle of olive oil. Serve just warm or at room temperature.
»»  READMORE...

In the past two and a half years, I have made this magnificent recipe for Carrot Cake with Cream Cheese Frosting exactly twice. The first time was when I was two weeks postpartum, in a state of incomprehensible exhaustion and its resulting delirium, and could often be found sobbing uncontrollably, vocally questioning why I had decided to have a child. The second time I made this carrot cake was on a recent Sunday following a Little C tantrum so epically demonic, it left me nearly sobbing uncontrollably and certainly questioning why I decided to have a child. You see the connection, yes?

If this unassuming-but-completely-perfect Carrot Cake with Cream Cheese Frosting recipe were actually my own, I think I would have to rename it Shauna's Coping Carrot Cake and enter it in numerous baking contests, simply to spread the gospel of its balming properties. Between now and the day Little C moves outmyhouse, this cake may save me from the asylum. It is my saving grace, my touchstone. You need this cake in your life.


So like most great toddler tantrums do, this one actually began with me doing my child a huge, wonderful flippin' favor. We had just arrived at the drugstore when Little C's sparkling brown eyes fell on a small Cinderella doll of reasonable price, and when she asked for it in her tiny voice, even remembering to say please, I agreed. How dear of her to ask so sweetly! How polite! Well.

Fifteen seconds later, my darling little womb fruit also saw a toy cell phone (of which we currently house roughly 12) and when I rejected her request, I think I saw her eyes actually turn red and shoot fire. The scuffed linoleum of the Walgreens floor suddenly began to split open, a great fiery chasm appearing right down that weird aisle that has both tampons and adult diapers, reminding all women of the ticking clock that is their estrogen levels. Dread filled every cell of my messy ponytailed, yoga pants-wearing Mom Body. I had to get out of there, and FAST.

As the screech of a thousand possessed, razor-clawed vultures emitted from my child's mouth and drew fearful stares from fellow customers, it became clear that whatever demon was setting up camp in her wee torso was immobilizing her. I was left with no choice but to throw her onto my back like a vermin-infested potato sack and leave my purchase of Tylenol 8 Hour (oh, the irony) for another time. (Although I'd like to think that if I'd accidentally shoplifted it in the fury, the Walgreens people would have told me it was on the house.) As for the Cinderella doll that had been merely a gateway to Armageddon, I made the game time decision that "Huh, maybe I shouldn't reward this type of behavior?" and chucked the offending doll head-first into one of those Lucite bins where they keep all the purse-sized hand sanitizers on the way out.

After narrowly missing getting kicked in the face nearly half a dozen times while securing the tiny, convulsing beast into her carseat, I drove the excruciating 10 minutes home, the windows open to prevent her otherworldly-pitched screams from reverberating throughout the entire vehicle. The sheer volume! The, the intensity, people! In an attempt to reject every natural reaction to such psychotic injustice (read: completely flip out, scream back at toddler, drive off the side of the road), I channeled the Dalai Lama or Jesus or Cesar Millan or whoever, and called upon them all to help me endure the relentless insanity that was unfolding in the backseat.

Upon swinging the car violently into the driveway, I hauled the still-screaming child up the stairs to her very confused father who only got a psychotic mumbled answer of "F@#*&cinderelladolltoycellphone" when he shouted over the din to find out what had happened. Fifteen minutes later, Little C had passed out in her bed Sybil-style, and I was making this carrot cake. Welcome to my world.

And about this carrot cake, anyway. Awesomely enough, it comes together with an ease that oh-so-few things ever do. Your food processor will be your best friend here--you'll grate the carrots, create an emulsion of your wet ingredients in it, and later, after a quick clean-out of the bowl, pull a dreamy cream cheese frosting together in it. It's a simply beautiful, quietly spiced, perfectly textured iced sheet cake. Everything plays well with each other here--even the cream cheese frosting, which can so often overwhelm a cake with its richness, just lays calmly in a soft slick atop the cake. I just can't say enough about it. Especially right now as I sit rubbing my temples, enjoying a hunk in the depths of my dark, quiet closet in lieu of a large glass of bourbon with a straw. I am so tired, you guys.

Carrot Cake with Cream Cheese Frosting
Adapted from Baking Illustrated

This recipe is great halved and baked in an 8x8-inch pan if you don't need to feed a crowd or stress.

Because they are akin to toddler currency and I always have them on hand, I used baby carrots for this recipe.

Be sure your cream cheese and butter are completely at room temperature before making the icing to get the best consistency.

For the cake:

2 1/2 cups all-purpose flour
1 1/4 teaspoons baking powder
1 teaspoon baking soda
1 1/4 teaspoons ground cinnamon (I love Vietnamese cinnamon)
1/2 teaspoon freshly grate nutmeg
1/8 teaspoon cloves
1/2 teaspoon salt
1 pound (about 6 to 7 medium) carrots, peeled (or an equal amount of baby carrots)
1 1 /2 cups granulated sugar
1/2 cup packed light brown sugar
4 large eggs
1 teaspoon pure vanilla extract
1 1/2 cups vegetable oil

For the frosting:

8 ounces cream cheese, at room temperature
5 tablespoons unsalted butter, at room temperature
1 tablespoon sour cream
1/2 teaspoon pure vanilla extract
1 1/4 cups confectioners' sugar, plus a little extra for adjusting the consistency of the icing

Preheat the oven to 350 degrees. Spray a 9x13-inch baking pan with cooking spray and line the bottom with parchment paper.

In a large bowl, whisk together the flour, baking powder, baking soda, cinnamon, nutmeg, cloves and salt.

Fit a food processor with the shredding disk, and shred the carrots into it. Dump the carrots into the bowl with the dry ingredients. Wipe out the bowl of the food processor with a paper towel--don't worry about getting it perfectly clean.

Pace the bowl back on the processor, and place in it the sugar, brown sugar, eggs and vanilla. run the processor to blend throughly, about 20 seconds. With the processor running, pour in the oil in a steady stream. Blend 20 seconds more.

Stir together the shredded carrots and flour until evenly mixed, and make a well in the center. Pour in the wet ingredients and stir well with a rubber spatula until the batter is evenly mixed and no lumps of dry ingredients remain. Scrape the batter into the prepared pan and bake until a toothpick inserted in the center comes out clean, about 35-40 minutes. Set the pan on a wire rack and let the cake cool completely, about 1 1/2 to 2 hours.

When the cake is cool, make the icing. In the clean bowl of a food processor, place the cream cheese, butter, sour cream and vanilla. Process until smooth, stopping to scrape down the bowl as necessary. Dump in the confectioners' sugar and process again just until smooth, about 10-15 seconds. Be careful not to overwork the icing, as it will start to break down if blended for too long.

Generously ice the cake, cut into squares and serve. Tightly cover and refrigerate any leftovers.
»»  READMORE...
Kedgeree is a fish & rice dish that's only been with us for just over a century now, an invented dish, mostly created by the British during their time in India. However, it seems to have fallen out of favour following the Edwardian period, and have never seen it offered in any Restaurant. This is a dish suitable for all year round, it's stuffed full of protein & carbs, and as a result, is particularly filling - one bowl can easily feed a family of three.

Now, Kedgeree is somewhat subjective. Some recipes call for certain spices to be used - i prefer to use none, because i don't like to mask the taste of the fish, but as with all the recipes i've posted so far, be creative, experiment, see what you fancy!

You will need the following ingredients:

2 sachets of Boil in the Bag Rice (it's easier to use, and less hassle, but use 2 cups of regular rice if you prefer)
2 fillets of skinless & boneless white fish like Cod/Coley etc (i use from frozen)
1 pack of Smoked Salmon (at least 5 decent slices around 6 inches square)
1 half cup of milk
4 eggs
Single Cream
Salted Butter
Parsley

Utensils needed:

Microwave (at least 650watt)
Large Serving Bowl - ideally 10 to 12" across
Small Saucepan
Medium Saucepan
Sharp Knife
Fork

First - take the white fish fillets, and put then in the bowl with the milk.

 
Microwave on full power for 5 minutes (This poaches the fish quicker than you can do it in a pan, and leaves less mess in its wake). At the same time, put your eggs in a saucepan of boiling water, and hard boil them (6 minutes is usually enough), and put the rice on to boil at the same time (keep an eye on it though, you don't want the pan to boil dry - at LEAST a litre of water in the pan is needed!). Once the white fish has been poached, take the bowl out of the microwave, and add the slices of smoked salmon on top in a layer.


Microwave for a further two minutes. Afterwards, take the fish out, and mash with the back of a fork - you want it fairly broken up.

Remove the shell on the hard boiled eggs by cracking the shells on a hard surface, and roll them back and forth - the shell should be pretty easily peeled away. Cut in half with a sharp knife, add to the bowl with the fish, and again, break up the eggs with the back of the fork, until it's been fairly well chopped up.

Add roughly an ounce of salted butter to the bowl, and a tablespoon of cream with the parsley.


Mix through, and microwave for one minute or until the butter has melted. At this stage - add the rice, and mix through thoroughly - you don't want any patches of plain rice.


On top of the mix - add TWO tablespoons of cream (spread over, rather than just in a concentrated spot), and add small slivers or curls of butter. Re-microwave until the butter melts. Take out, mix through one final time, and it's ready to serve!


Sometimes, for a bit of an added indulgence, i like to add some mild cheddar - finely grated over the top, so it melts really quickly. Yes, it's a little bit of an odd mix, fish, rice and egg, but try it - you might like it as much as the Edwardians did!
»»  READMORE...

Is it sort of wrong that I've managed to combine something as sweet, innocent and all-American as Girl Scout cookies with liquor?

I mean, I dunno. Maybe. I can't be sure. I'm kind of all impaired on milkshake right now.

Boozy Thin Mint Milkshake. Get you some.

Maybe it's because I'm half a boozy milkshake-deep right now, but I just love when St. Patrick's Day rolls around, don't you? I mean, first of all, it lets us all know that Spring is finally, finally on it's way. I also sort of love the way that everybody suddenly tells you that they're Irish, no matter how tiny of a sliver actually exists in their ethnic breakdown (I'm about one-sixteenth, by the way). I can't think of a single person I know who doesn't look terrific in green. And really, people, the pure unadultered celebration of beer just can't be beat. I try not to think about the leprechaun part, because that's just creepy, but luckily things like McDonald's Shamrock Shake take your mind off the idea that a tiny, green man could be hiding out under your bed this very second.

Another thing that is always hotly anticipated this time of year is the appearance of those sweet little Girl Scouts out in front of grocery stores, banks and post offices, manning their card tables stacked with boxes, their adorable, dutiful little faces sucker-punching you with requests to buy their crack-like cookies. Every year, I think, just a box of Thin Mints, please, darling Amanda, and every year, without fail, I come away with at least a half-dozen boxes. And then inevitably, the very same day, the husband brings another half-dozen boxes home from work, purchased from some office mate's kid. Anyone who says people gain the most weight over the holidays have clearly never considered Girl Scout cookies in March. Trouble.

So really, this milkshake celebrates everything that's great about St. Patrick's Day. The appearance of the most popular Girl Scout cookie, cheery green things, and booze. Oh, and ice cream, because, ice cream is always something to celebrate. It's also kind of glorious to come up with a way to cram a day's worth of calories in a glass.

Boozy Thin Mint Milkshake

Ironically, I found the lucky number 7 to be the perfect number of cookies for this milkshake. More is always welcome, but I wouldn't recommend less.

I'm including green food coloring here as an option, but I didn't find it necessary--the shake had a pretty, mint green color that didn't show up as vibrantly in the above photo.

If you're a teetotaler or a small child, replace the creme de menthe with a splash of milk, a bit of peppermint extract and a few drops of green food coloring.

Makes 1

4 scoops vanilla ice cream (about 1 generous cup)
3-4 tablespoons creme de menthe
7 Girl Scout Thin Mint cookies
Green food coloring, optional

Toss all ingredients into a blender. Blend thoroughly. Add a drop or two of green food coloring if you wish. Serve immediately. You're welcome.
»»  READMORE...
Confession: For all my Type A cleanliness requirements in the kitchen, my cooling racks are almost always a hot mess. A little slick of oil here, bits of browned crust clinging in the crevices, random smudges of chocolate on the undersides. I mean, it's not that I don't try to clean my cooling racks, because usually, I do. And I usually also end up looking like Chris Farley in that scene from Tommy Boy, hot water ricocheting off every wire, into my eyes, running down my arms, driving me mad until I just sort of give up on the whole thing, bits of clinging hardened crumbs and soap suds left behind, telling myself that they're clean enough. Even a run through the dishwasher doesn't always give the desired results of a squeaky clean cooling rack.

Granted, this is absolutely a first world problem, and perhaps your cooling rack cleanliness is totally on point and I am the only one on the planet with this issue. But! Recently I had a brainstorm about a great way to clean cooling racks, and because such flashes of brilliance tend to be so rare and effective, I had to share this tip with you guys.

Pull out a rimmed sheet pan that is big enough for your cooling rack to nest in (your standard half sheet pan with 1-inch tall sides should fit the bill for most racks). Maybe you've got a sheet pan that needs a little cleaning as well--bonus! If your sink is big enough, set the pan in it; if not, cover the counter with a towel and work on top of it. Set the cooling rack in the sheet pan, and fill the pan with the hottest water you've got and some dish soap. Let the whole thing soak for a few minutes, and then have at the submerged cooling rack with the scrubby side of a sponge. Flip the rack over and clean the underside. Dump out the dirty water, give the sheet pan a quick rinse, and fill with clean water. Set the rack back in the pan and swish the clean water over it to rinse the rack. Simple, effective and leaves you with a dry kitchen ceiling. Hooray!
»»  READMORE...

Cookies are nice. Brownies are perfectly lovely. Simple joys in your run-of-the-mill long week. But then there are Those Weeks. The kind that start innocently enough, full of work and house stuff and errands and lots of c'mon! I just washed this!--same old thing. And then, without fair warning, the universe throws you a curveball the size of Charlie Sheen's list of issues. Before you know it, your normal cookie-and-brownie week has morphed into meetings and frantic phone calls and packing and airports (all for good--don't panic) on top of mothering a tiny person who constantly seems to be one step away from setting the place on fire and--kicker--a frenetic family trip to see Disney on Ice. I-yi-yi. Do they even make Calgon anymore?

When your saving grace is a dear friend inviting your crazy family over for pizza and wine on a Friday night and you've said you're bringing dessert, cookies and/or brownies aren't going to cut it. You need a flippin' Milky Way Tart in your life. This is one of Those Weeks, people. It's the only thing you can do to survive.


Last week, this creamy, dreamy, caramelly specimen shone like a beacon through the madness. This tart is basically a stone cold fox. I mean, we all know a little salted caramel never hurt anyone, but this sexy beast of a dessert has it drizzled over a pillowy milk chocolate mousse and in a generous slick atop the crust. Oh, my. My, my, my.

Let's (suggestively) touch on the subject of the milk chocolate mousse that fills this tart, shall we? In short, I could have happily disappeared into the recesses of my closet with the mixing bowl and a spoon. I would also like to develop a sort of moisturizer inspired by this mousse, so that I might completely enrobe myself with it. It's nothing more than melted chocolate and cream, whipped together, but the result is otherworldly.

This is the first recipe I've tried from Joanne Chang's totally perfect Flour cookbook, but I've gotta say, girlfriend is in serious contention for one of the seats at the loud, long lunch daydream that has become my happy place. I think I'd seat her between Lynne Rossetto Kasper and Shirley Corriher.

Lynne would have us all drooling with a very vivid LRK-esque description of Joanne's legendary Sticky Buns and Shirley could enlighten us all with the science behind their perfection. The table would be set by Ina, entirely in whiteware and vintage silver. Christopher Kimball would raise an eyebrow at our girlish giggles from across the table. There would be lots of Prosecco. I might wear something from Anthropologie. I dunno, I'm just throwing it out there, just saying. It could happen.

Milky Way Tart
Adapted from Joanne Chang's Flour: Spectacular Recipes from Boston's Flour Bakery + Cafe

Makes 1 9-inch tart

For the tart shell, use your favorite pie or tart dough recipe, baked off in a 9-inch tart pan with a removable bottom. I totally recommended my foolproof Favorite Pie Crust, made with 1 tablespoon of sugar. Or heck, use a good store-bought one and make it taste better.

There are few things as dreamy as a homemade caramel sauce like the one in this recipe for the filling and drizzling the tart, but there's no reason you couldn't use a nice, thick, high-quality store-bought caramel sauce. You'll need about 1 1/2 cups of it, and if it's very sweet, add salt to taste until you can taste a nice hint of salt.

If you are anti-corn syrup, you can leave it out of the caramel altogether, just be extremely careful not to let any sugar crystals cling to the side of pan while the sugar is caramelizing by washing down the sides of the pan with a wet pastry brush. I like to throw in a dab of corn syrup for the anti-crystallization insurance.

There are a lot of instructions and notes here, but the process is actually really simple, and all the elements can be made several days ahead of assembly. Just read through the recipe a few times so you can time out the steps the way that will work best for you.

For the milk chocolate mousse:

5 ounces milk chocolate, chopped (I used Ghiradelli chips and it was fine)
2 cups (1 pint) heavy cream
1 teaspoon instant espresso powder
1/8 teaspoon kosher salt

For the caramel filling:

3/4 cup granulated sugar
1/3 cup water
1 tablespoon corn syrup (optional--see note)
3/4 cup heavy cream
2 tablespoons unsalted butter
1/4 teaspoon kosher salt
2 teaspoons vanilla extract

For the tart assembly:

One baked and cooled 9-inch tart shell (like My Favorite Pie Crust)
3-to 4-inch slab milk chocolate, at warm room temperature, for decorating


Place the chopped chocolate (or chocolate chips) in a medium heatproof bowl.

Gently heat the cream with the espresso powder and salt in a small saucepan over medium heat. As soon as you see bubbles beginning to form around the edges of the pan, remove it from the heat--don't let the cream come to a boil. Pour over the chocolate and let sit for 1 minute. Whisk until smooth. Transfer the mixture to a mixing bowl (I prefer a metal bowl for faster cooling, and poured it straight into the bowl of my standing mixer). Cover the bowl tightly with plastic wrap and place in the refrigerator until very cold, at least 8 hours and up to 3 days ahead. The mixture needs to be extremely cold in order for it to whip properly, so don't skimp on the chilling time. If you are short on time or generally impatient like me, throw the metal bowl into the freezer and give it a good whisking every 5-10 minutes or so--you can complete the chilling this way in about an hour.

To make the caramel, place the sugar, water and corn syrup in a medium saucepan and stir well to combine. Bring the syrup to a boil over medium-high heat and cook until the syrup becomes a deep amber color. Pull the pan from the heat when you see it reaching a deep golden color--it takes only a moment for caramel to go from golden to amber to straight up burnt, so pull it early if in doubt. Stirring constantly with a whisk or heatproof spoon, stir in the cream all at once. Be careful--it will bubble up violently, but keep stirring until the lumps of caramel smooth out once again. Stir in the butter, salt and vanilla. When the caramel is smooth and well-blended, pour it into a small heatproof container and set in the refrigerator to cool and thicken, at least 4 hours or up to 1 week. Again, using a metal container (I use a loaf pan) will cut this time down significantly.

When the cream mixture and caramel have both cooled sufficiently, assemble the tart. Place the tart shell on a serving platter. Spread about three-fourths of the caramel evenly over the bottom of the tart shell. Fit the bowl with the cream mixture onto a stand mixer fitted with the whisk attachment and whip on medium-high speed until stiff peaks form (or beat with a handheld mixer). Mound the chocolate mousse on top of the caramel and smooth evenly.

Using a vegetable peeler, make chocolate curls from the bar of milk chocolate: warm the bar slightly in the palm of your hand before pulling the peeler across it to get curls instead of just grating the chocolate. Drizzle the tart with the remaining caramel and follow it with a generous sprinkling of chocolate curls. Refrigerate the tart for 30 minutes before serving (or airtight for up to 8 hours).
»»  READMORE...
Really, what's better than putting a carb-y, breakfast-y baked good in your face first thing in the morning? I mean, never mind that you might feel like you're walking in mud for the rest of the day if you start things out with jelly doughnut--I'm talking more about instant gratification here. Because a croissant and coffee for breakfast? Glorious. But one morning pastry I tend to pass over, never even pausing to consider it, is the humble scone. I've always sort of thought scones were just a big snore.

Truthfully, most coffee shop specimens do leave a lot to be desired--dry, pale, lifeless, crumbly. Bah. Why bother? Pass the cheese danish, sister.

But let me tell you about the recipe that recently changed my mind about scones. Chocolate Chip Espresso Scones. Look into it.

Oh, hey, you know what? Now that I'm sitting here, pontificating scones like a crazy person, I think I've thought of another reason for my heretofore disdain for them.

It must have been about 10 years ago, because I was still living in Chicago. Probably just a year out of college. Definitely wearing something from The Limited. I was meeting with my agent at the time at a coffee shop, drinking a latte and picking at one of those aforementioned substandard cafe scones. I don't even know why I ordered it--maybe because I was barely in my 20s and could absentmindedly snack on things like horrible scones and not think about my pants size.

Anyway, the topic of my conversation with my agent was moving to Los Angeles to pursue an acting career, and in short order she told me that I might want to "lose some pounds". As I took in that advice, I continued to snack on the horrible scone. A few beats later the well-meaning agent said, "That's a huge scone." And that was the end of my relationship with scones.

Until now. Now I know what to look for in scones. Also, how to interpret advice. So there's that.

So, hey, back to these really good scones. Scones that won't leave your mouth dry with regret and overworked flour. Scones of empowerment! Yeah!

It's no surprise that the recipe that has converted me to Scone Lover is from the amazing Karen DeMasco, she of pastry stardom and a little restaurant you may have heard of. All of the recipes in her book The Craft of Baking have this wonderful feel to them, something I can't quite put my finger on. Terrifically refined, but with a homespun feel. Every recipe has a bit of an unexpected twist--a flavor boost, a surprising technique--that takes even the most typical of baked goods to the next level. Like a throwing chocolate and espresso into a scone, and making it moist and buttery to boot. Genius.

Like most scone recipes, the dough comes together in a flash. A healthy handful of chocolate chips and a hit of espresso lend a ton of personality here. The scone itself has fabulously crunchy edges that give way to a tender, cakey interior. I really can't say enough about these scones. Or learning how to filter thinly veiled criticism. Psshh.


Chocolate Chip Espresso Scones
Adapted from Karen DeMasco's The Craft of Baking

You can cut the scones in whatever size and shape you like--I made mine into rustic squares and on the smaller side and got 16 out of a batch.

Once the scones are rolled and cut, you can wrap them unbaked tightly in plastic wrap and refrigerated for up to 2 days in the fridge or 2 weeks in the freezer. When baking frozen scones, don't thaw them, just bake them frozen for about 5 minutes longer.

Makes 12-16, depending on size

1 3/4 cups all-purpose flour, plus more for dusting
1 tablespoon plus 1/2 teaspoon baking powder
1/4 cup plus 2 tablespoons granulated sugar
1/2 teaspoon kosher salt
6 tablespoons (3/4 stick) chilled unsalted butter, cut into small pieces
1 tablespoon instant espresso powder
1 cup plus 2 tablespoons heavy cream
2/3 cup semi-sweet chocolate chips
Coarse sugar, such as turbinado or sanding sugar, for sprinkling


In the bowl of an electric mixer fitted with the paddle attachment, stir together the flour, baking powder, sugar and salt. Add the butter pieces to the bowl. Place the bowl in the freezer for 5 minutes.

Meanwhile, in a small bowl, combine the espresso powder with 1 teaspoon hot water, whisking to dissolve the espresso. Whisk in 1 cup of the cream. Set aside.

Take the bowl out of the freezer. Put it back on the mixer on low speed until the butter is broken down into pebble-sized pieces. Stir in the chocolate chips. Pour in the espresso-cream mixture and mix on low speed just until the dough comes together.

Lightly dust a work surface and rolling pin with flour. Turn the dough out and gently knead it a few times just to bring it together. Roll the dough into a circle or rectangle (your preference), about 1-inch thick. Using a sharp knife, cut the dough into equal wedges or squares (12 to 16 pieces, depending on how big you like your scones). Place the scones on a parchment-lined baking sheet and cover with plastic wrap. Freeze for 15 minutes, or chill for 1 hour in the refrigerator.

While the scones are chilling, preheat the oven to 375 degrees. Brush the chilled scones with the remaining 2 tablespoons of cream and sprinkle generously with coarse sugar. Bake the scones until they are golden brown on the edges and bottoms, and firm to the touch, 20-25 minutes. Cool on a wire rack. Serve warm or at room temperature.
»»  READMORE...