Tampilkan postingan dengan label Pies and Tarts. Tampilkan semua postingan
Perhaps you've been hanging around the Piece of Cake kitchen long enough to learn about my Happy Place, the imaginary wonderland to which I tend to drift when things go awry, or even when things are going fantastically well. Its that daydream wherein I have a long, loud lunch with several of my culinary heroes, and we all get to chitchatting like old friends. It's glorious, basically. And at the head of the virtual table sits my personal Food Oprah, Lynne Rossetto Kasper. She's the host of The Splendid Table, a radio show that covers everything you could possibly want to know about food, cooking and baking. It is the Happy Place of many, I am sure.

And guys? Um, recently? I actually got to talk to LRK herself as I contributed a question to the call-in portion of the show. I tried not to die a little from the fabulousness of it all. I also somehow managed not to tell her about my restraining-order-level fandom and related crazy daydream. I know, I don't know EITHER.

But what we did talk about was terrific. As LRK is an expert on all things related to Italian cuisine, I wanted to get her suggestions for a few rustic Italian dessert recipes that I might try and share with you all. I've unleashed my panna cotta obsession on you a few times, and I wanted something in that same vein--something wholly delicious in its simplicity, the sort of thing I might pull together if I was a housewife in the Italian countryside (which, by the way, is also a daydream I have, but that is neither here nor there).


Faster than you could say "Culinary Psychic", Lynne pulled an idea out of the ether to meet my inquiry. I really don't know how she does it, people. She is so flippin' amazing that I would pretty much try any recipe she threw at me, even if it meant going against one of my strongest personal pastry beliefs and putting salad ingredients in my dessert. Like rosemary and extra virgin olive oil. Say what? I ruffled a bit at first, but dang if she wasn't right on. Every time, that LRK! Magic.
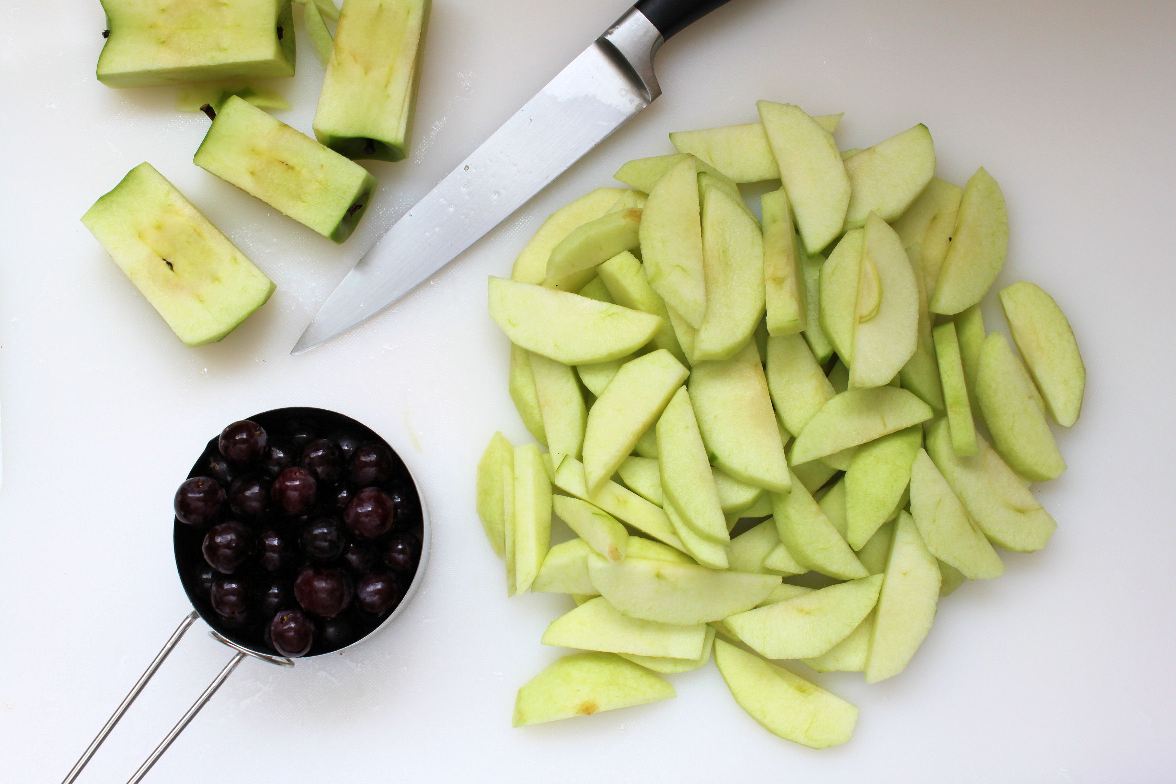

So the next day, I pulled together a lively fruit crostata with a few of the usual suspects--buttery pastry, tart apples, a dash of sugar. But! Per LRK's instructions, I upped the crazy with the addition of red grapes, a smattering of rosemary and a finishing drizzle of the sort of potent olive oil that someone gifts you for Christmas and you hang onto it for a special occasion. Because believe me, this crostata is indeed something special.

Now, I did riff a bit on her suggestions, but as any disciple of The Church of LRK can attest, this is something we are encouraged to do regularly. Not to mention that my choice to incorporate fresh rosemary into a frangipane (rather than just sprinkling it about) was downright delightful, so I feel good about going off the rails a bit here. It's what Lynne would want.

The nutty, ambrosial frangipane gives a bit of richness and offers a nice cushion for the fresh rosemary, muting it just a touch so you get all its lovely herbacious notes and a hint of woodsiness to elevate the fruit flavors (including the ones in the olive! oil!) without the pungent, almost soapy, quality that rosemary can often have.

And hello, baked grapes?! Why have I not been doing this my entire life? The grape flavor becomes so lush, so alive, it's like grapes on steroids. They taste the way I felt after talking to LRK. See, I told you I was nuts.

Herbed Fruit Crostata with Apples and Grapes
Inspired by and adapted from Lynne Rossetto Kasper

I've used a firm, tart apple here, but pears of any variety would also be wonderful.

For the fruit:

4 medium Granny Smith apples, peeled, cored and sliced into 1/4 inch-thick slices
1 cup red seedless grapes (halved if they're on the large side)
1 tablespoon freshly squeezed lemon juice
2 tablespoons brown sugar

For the rosemary frangipane:

4 ounces almond paste, crumbled
1/2 teaspoon finely minced fresh rosemary
1 1/2 teaspoons sugar
1 1/2 teaspoons all-purpose flour
1/8 teaspoon almond extract
6 tablespoons unsalted butter, cut into cubes, at room temperature
1 large egg, at room temperature

For the crust:

1 10-inch pie crust (like half a batch of My Favorite Pie Crust), well-chilled
1 tablespoon unsalted butter, melted
2 teaspoons extra virgin olive oil

Preheat the oven to 375 degrees. Line a baking sheet with parchment paper.

In a medium bowl, toss together the apples, grapes, lemon juice and brown sugar. Set aside to let the flavors hang out for a while.

In the bowl of a food processor, place the almond paste, rosemary, sugar, flour and almond extract. Pulse until the mixture is well-blended and evenly textured. Add butter and process until well-mixed. Scrape down the bowl and add the egg. Process until the frangipane is perfectly smooth.

Lightly sprinkle a work surface and a rolling pin with flour, and roll the pie crust into a large, shaggy-edged circle, about 14 inches in diameter. Roll the crust onto your rolling pin to help you carefully transfer the crust to the parchment-lined sheet pan. Smear the crust with the frangipane, leaving about a 2-inch border right around the edges of the crust. Place the apple slices onto the crust, first in a single layer, and then tuck any slices that remain into the gaps. Be sure to pull the apples from any liquid that has pooled in the bottom of the bowl rather than dumping the whole lot atop the crust--you don't want to make the crust soggy. Artfully dot the grapes across the surface of the apples. Fold the edges of the crust up and over the fruit, leaving the center exposed.

Whisk together the melted butter and olive oil, and lightly brush the crust with it. Dribble any extra over the fruit. Bake the crostata until the crust is golden and the fruit is bubbling, about 1 hour. Let cool on the pan for five minutes before using the parchment to slide the crostata onto a wire rack to cool further. Just before serving, sprinkle the crostata with a, extra smattering of fresh rosemary and a tiny drizzle of olive oil. Serve just warm or at room temperature.
»»  READMORE...

Cookies are nice. Brownies are perfectly lovely. Simple joys in your run-of-the-mill long week. But then there are Those Weeks. The kind that start innocently enough, full of work and house stuff and errands and lots of c'mon! I just washed this!--same old thing. And then, without fair warning, the universe throws you a curveball the size of Charlie Sheen's list of issues. Before you know it, your normal cookie-and-brownie week has morphed into meetings and frantic phone calls and packing and airports (all for good--don't panic) on top of mothering a tiny person who constantly seems to be one step away from setting the place on fire and--kicker--a frenetic family trip to see Disney on Ice. I-yi-yi. Do they even make Calgon anymore?

When your saving grace is a dear friend inviting your crazy family over for pizza and wine on a Friday night and you've said you're bringing dessert, cookies and/or brownies aren't going to cut it. You need a flippin' Milky Way Tart in your life. This is one of Those Weeks, people. It's the only thing you can do to survive.


Last week, this creamy, dreamy, caramelly specimen shone like a beacon through the madness. This tart is basically a stone cold fox. I mean, we all know a little salted caramel never hurt anyone, but this sexy beast of a dessert has it drizzled over a pillowy milk chocolate mousse and in a generous slick atop the crust. Oh, my. My, my, my.

Let's (suggestively) touch on the subject of the milk chocolate mousse that fills this tart, shall we? In short, I could have happily disappeared into the recesses of my closet with the mixing bowl and a spoon. I would also like to develop a sort of moisturizer inspired by this mousse, so that I might completely enrobe myself with it. It's nothing more than melted chocolate and cream, whipped together, but the result is otherworldly.

This is the first recipe I've tried from Joanne Chang's totally perfect Flour cookbook, but I've gotta say, girlfriend is in serious contention for one of the seats at the loud, long lunch daydream that has become my happy place. I think I'd seat her between Lynne Rossetto Kasper and Shirley Corriher.

Lynne would have us all drooling with a very vivid LRK-esque description of Joanne's legendary Sticky Buns and Shirley could enlighten us all with the science behind their perfection. The table would be set by Ina, entirely in whiteware and vintage silver. Christopher Kimball would raise an eyebrow at our girlish giggles from across the table. There would be lots of Prosecco. I might wear something from Anthropologie. I dunno, I'm just throwing it out there, just saying. It could happen.

Milky Way Tart
Adapted from Joanne Chang's Flour: Spectacular Recipes from Boston's Flour Bakery + Cafe

Makes 1 9-inch tart

For the tart shell, use your favorite pie or tart dough recipe, baked off in a 9-inch tart pan with a removable bottom. I totally recommended my foolproof Favorite Pie Crust, made with 1 tablespoon of sugar. Or heck, use a good store-bought one and make it taste better.

There are few things as dreamy as a homemade caramel sauce like the one in this recipe for the filling and drizzling the tart, but there's no reason you couldn't use a nice, thick, high-quality store-bought caramel sauce. You'll need about 1 1/2 cups of it, and if it's very sweet, add salt to taste until you can taste a nice hint of salt.

If you are anti-corn syrup, you can leave it out of the caramel altogether, just be extremely careful not to let any sugar crystals cling to the side of pan while the sugar is caramelizing by washing down the sides of the pan with a wet pastry brush. I like to throw in a dab of corn syrup for the anti-crystallization insurance.

There are a lot of instructions and notes here, but the process is actually really simple, and all the elements can be made several days ahead of assembly. Just read through the recipe a few times so you can time out the steps the way that will work best for you.

For the milk chocolate mousse:

5 ounces milk chocolate, chopped (I used Ghiradelli chips and it was fine)
2 cups (1 pint) heavy cream
1 teaspoon instant espresso powder
1/8 teaspoon kosher salt

For the caramel filling:

3/4 cup granulated sugar
1/3 cup water
1 tablespoon corn syrup (optional--see note)
3/4 cup heavy cream
2 tablespoons unsalted butter
1/4 teaspoon kosher salt
2 teaspoons vanilla extract

For the tart assembly:

One baked and cooled 9-inch tart shell (like My Favorite Pie Crust)
3-to 4-inch slab milk chocolate, at warm room temperature, for decorating


Place the chopped chocolate (or chocolate chips) in a medium heatproof bowl.

Gently heat the cream with the espresso powder and salt in a small saucepan over medium heat. As soon as you see bubbles beginning to form around the edges of the pan, remove it from the heat--don't let the cream come to a boil. Pour over the chocolate and let sit for 1 minute. Whisk until smooth. Transfer the mixture to a mixing bowl (I prefer a metal bowl for faster cooling, and poured it straight into the bowl of my standing mixer). Cover the bowl tightly with plastic wrap and place in the refrigerator until very cold, at least 8 hours and up to 3 days ahead. The mixture needs to be extremely cold in order for it to whip properly, so don't skimp on the chilling time. If you are short on time or generally impatient like me, throw the metal bowl into the freezer and give it a good whisking every 5-10 minutes or so--you can complete the chilling this way in about an hour.

To make the caramel, place the sugar, water and corn syrup in a medium saucepan and stir well to combine. Bring the syrup to a boil over medium-high heat and cook until the syrup becomes a deep amber color. Pull the pan from the heat when you see it reaching a deep golden color--it takes only a moment for caramel to go from golden to amber to straight up burnt, so pull it early if in doubt. Stirring constantly with a whisk or heatproof spoon, stir in the cream all at once. Be careful--it will bubble up violently, but keep stirring until the lumps of caramel smooth out once again. Stir in the butter, salt and vanilla. When the caramel is smooth and well-blended, pour it into a small heatproof container and set in the refrigerator to cool and thicken, at least 4 hours or up to 1 week. Again, using a metal container (I use a loaf pan) will cut this time down significantly.

When the cream mixture and caramel have both cooled sufficiently, assemble the tart. Place the tart shell on a serving platter. Spread about three-fourths of the caramel evenly over the bottom of the tart shell. Fit the bowl with the cream mixture onto a stand mixer fitted with the whisk attachment and whip on medium-high speed until stiff peaks form (or beat with a handheld mixer). Mound the chocolate mousse on top of the caramel and smooth evenly.

Using a vegetable peeler, make chocolate curls from the bar of milk chocolate: warm the bar slightly in the palm of your hand before pulling the peeler across it to get curls instead of just grating the chocolate. Drizzle the tart with the remaining caramel and follow it with a generous sprinkling of chocolate curls. Refrigerate the tart for 30 minutes before serving (or airtight for up to 8 hours).
»»  READMORE...

So is it just me, or is there way more pressure involved with Valentine's Day when it falls on a weekend? Something about it being on a Friday, Saturday or Sunday creates high drama and expectations--wine, roses, fancy dinner reservations. Also, feeling compelled to take a lengthy shower, exfoliate and wear something spectacular. In other words, STRESS. Right?! Gah.

Thankfully, this year Valentine's Day falls on a Monday, so we can all rest easy. I'm thinking something homemade, insanely delicious and crazy clever for breakfast along with a sweet card will fit the bill just fine. If you go with these Nutella Pop-Tarts, for instance, it will totally make up for couching it--wholly ungroomed and in stretchy black pants--by 7:30 p.m. on February 14th. Because hey, it's a Monday. I'm sticking with that theory.


Nutella is clearly one of the best inventions ever, and it holds fine sense memories of all sorts for me. In fact, one of my top reasons to move to Europe is eating Nutella for breakfast without reservation. But with World Nutella Day fast approaching, people all over this wonderful Earth can bond over scarfing down bread and chocolate with abandon first thing in the morning. I can't think of anything more world peace-encouraging than that, except for maybe joining forces of the most questionable breakfast foods of both Europe and America, and creating the Nutella Pop-Tart. And just in time for World Nutella Day? I'm feeling a Nobel Peace Prize nomination coming on here, people. Just saying.

Happily, promoting world peace and sugar high-inducing breakfasts couldn't be easier. All it takes is a batch of flaky, foolproof pie dough and a jar of Nutella. Oh, and a glossy, coffee-spiked glaze to shine things up. Because coffee things definitely mean breakfast, right?


The resulting pastries are so positively divine, you'll feel all kinds of love this Valentine's Day. Including the priceless joy that comes from eating chocolate for breakfast and the knowledge that exfoliation is totally optional.


Nutella Pop-Tarts

If you use My Favorite Pie Crust recipe, make it with 2 tablespoons of sugar. If you use another pie crust recipe, just make sure it's enough to make 1 double-crusted 9 or 10-inch pie.
Makes 12

For the tarts:

1 batch of My Favorite Pie Crust, well-chilled (see note)
1 (13-ounce) jar Nutella
1 egg

For the glaze:

1 1/4 cups confectioners' sugar
2 tablespoons strong brewed coffee
1 tablespoon dark unsweetened cocoa powder (I like Valrhona)
1/2 teaspoon pure vanilla extract


Line two baking sheets with parchment paper or silicone baking mats.

Divide the chilled pie dough in half. Working with one half at a time (refrigerate the half you're not working with), roll the dough out to a rectangle, about 9 1/2 x 13 inches. To make for a more even rectangle, use a thin, sharp knife to trim the edges. Patch any shaggy edges together using the dough scraps. The more evenly shaped your rectangle, the easier it will be to form neat-looking tarts. Cut the dough rectangle into 12 equal squares on a grid, 4 down and 3 across. Place the squares on the baking sheets, 6 squares per sheet.

Using spoons or a small ice cream scoop, dollop 1 generous tablespoon of Nutella in the center of each dough square, spreading slightly as you go, leaving a 1/2 inch border of dough around the filling.

Repeat the dough rolling and cutting process with the second half of the dough.

In a small bowl, beat together the egg with 1 teaspoon water and a pinch of salt, whisking until the egg wash is liquified and well-blended. Using a pastry brush, lightly brush the exposed border of dough around each mound of filling (set the remaining egg wash aside to brush the assembled tarts if baking them the same day). Place a second dough square on top of each tart, using your fingers to gently press the seams together. Use a fork to crimp together the two layers of dough. Refrigerate for at least 20 minutes (at this point, you can cover the baking sheets with plastic wrap and chill overnight).

When you're ready to bake, preheat the oven to 350 degrees. Lightly brush the top and edges of each tart with the remaining egg wash. Bake until the tarts are golden brown on the top and bottom, about 35-40 minutes. Cool for 1 minute on the baking sheets, and then transfer the tarts to cooling racks.

To prepare the glaze, whisk together all the ingredients until smooth.

When the tarts are just slightly warm, spoon the glaze over them. Let the glaze dry for 15 minutes before serving. Store leftovers in an airtight container at room temperature for 2 days.
»»  READMORE...